Your First Web Component with Dart
With all the power we have from HTML5 and the modern web platform, you can't easily do simple things like extend <button>. Luckily, this is changing and the web platform is undergoing a declarative renaissance. Thanks to the hard work of many groups and individuals across different browser vendors and spec committees, Web Components are emerging as the way to bring structure and encapsulation to modern web developers. The best news yet: you don't need to wait years for these new standards to be implemented, you can use Dart to build Web Components today.

Web Component basics
The component model for the web, aka Web Components, is a collection of specifications that allow developers to build reusable, encapsulated, and declarative widgets.
When people say "Web Components" they generally mean these four ideas:


Here is an embedded demo:

Web Component basics
The component model for the web, aka Web Components, is a collection of specifications that allow developers to build reusable, encapsulated, and declarative widgets.
When people say "Web Components" they generally mean these four ideas:
- templates, which define chunks of markup that are inert but can be activated for use later
- decorators, which apply templates to let CSS affect rich visual and behavioral changes to documents
- custom elements, which let authors define their own elements, including new presentation and API, that can be used in HTML documents
- shadow DOM which defines how presentation and behavior of decorators and custom elements fit together in the DOM tree
Custom elements
I'm most excited by custom elements because they allow me to build, share, and use <x-fancy-button> in my apps.
A custom element can encapsulate the structure, styles, and behavior of a user-defined tag. The structure, or all the nested divs and spaces, is hidden inside the custom element and not immediately visible to the page's DOM. The CSS styles can be scoped to just this new element, to prevent leaking through to the rest of the document. Custom behavior, via JavaScript or Dart, can be attached to further specialize the API of the element.
Data binding
Most developers want a way to update the view (aka the HTML page) when the model (aka plain old Dart objects) changes, and visa versa. This technique is called data binding, and most modern MVC-esque frameworks have some support for making this easy.
While not specifically part of the Web Components page 'o tricks, model driven views are an important aspect to the emerging modern web app stack. MDV, as it is often called, uses a declarative syntax for one-way and two-way data binding of data and views.
Using Web Components today
The Dart team has been hard at work building Web UI in Dart that builds on top of Web Components, and making them available to modern browsers today. It's easy to write your first component, let me show you how.
(The following assumes you have Dart Editor installed and working. While it's not a requirement, the editor makes things a bit easier thanks to its automated build system.)
1) Create a new project
Create a new project in Dart Editor, with both "Generate content for a basic web app" and "Add Pub support" checked.

2) Add the Web Components package
Open the pubspec.yaml file and add the dependency to the web_components package:
 name: App
 description: A sample application

 dependencies:
  web_ui: any
3) Install dependencies
Select the pubspec.yaml file in the editor and go to Tools | Pub Install. Assuming it worked, you will see a new packages folder in your application, with web_components and all of its dependencies.

4) Add the build script
Web Components need to be compiled into vanilla Dart (and then, JavaScript) and HTML. To make this easy, the editor can run a build script whenever a file is changed. Don't worry, it's very fast.
Add this file as build.dart in the root of your application (parallel to web/ and packages/):
 import 'package:web_components/component_build.dart';
 import 'dart:io';

 void main() {
  build(new Options().arguments, ['web/App.html']);
 }
5) Add the custom component
This example uses a custom component for a clickable button and its output. Not exactly the most exciting thing in the world, but it's small and self contained.
Create a click.html file inside the web/ directory and add this:
 <html><body>
  <element name="x-click-counter" constructor="CounterComponent" extends="div">
   <template>
    <div>
     <button on-click="increment()">Click me</button>
     <span>(click count: {{count}})</span>
    </div>
   </template>
   <script type="application/dart">
    import 'package:web_ui/web_ui.dart';

    class CounterComponent extends WebComponent {
     int count = 0;
     void increment() { count++; }
    }
   </script>
  </element>
 </body></html>
The <element> tag defines the new custom element, which in this case extends the <div> element. The structure of this new element is found inside the <template> tag.
When the <button> is clicked, the increment method is called on this element. This custom behavior is defined in the Dart code inside of the <script> tag.
The {{count}} syntax is data binding between the element's count field (again, defined in the <script> code) and the DOM output. When the element's count field changes, the DOM is updated.
6) Clean up the editor's default boilerplate
Delete the following files from your project, they aren't needed for this example:
- web/App.dart
- App.html
- App.css
7) Use the custom element
Create a web/App.html and use the following code:
<!DOCTYPE html>
<html>
<head>
<meta charset="utf-8">
<title>App</title>
<link rel="components" href="click.html">
</head>
<body>
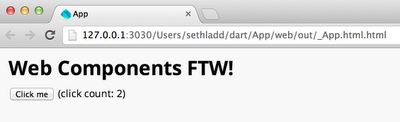
<h1>Web Components FTW!</h1>
<x-click-counter></x-click-counter>
<script type="application/dart">main() {}</script>
<script src="https://dart.googlecode.com/svn/branches/bleeding_edge/dart/client/dart.js"></script>
</body>
</html>
Notice how the Web Component itself is included into this document with the <link> tag in the <head>. My favorite part is the <x-click-counter> right in the middle of the document.
Note the empty main() function in the <script> tag, which is also required.
8) Run the app!
The build script should have generated all the code necessary, but if not you can right click on build.dart and select Run.
You should see a web/out directory, and inside of that a web/out/App.html.html file. Right click on App.html.html and select "Run in Dartium".
Here is an embedded demo:
Click the button, and the click count updates!
9) Run the app in Firefox
Sure, running Dart code natively on the VM is fun, but running a Dart app with Web Components in other modern browsers is even more fun.
Right click on App.html.html and select "Run as JavaScript". This compiles your app into JavaScript and launches your default browser. You can then copy the URL and paste it into other modern browsers. I tried it in stable Chrome, Firefox, and Safari.
Summary
There's so much more to cover, but hopefully you saw that it's easy to build Web Components with Dart and compile down to code that runs across modern browsers.
You can read more about Web Components, or more about Dart + Web Components, or more about Dart + Web Components + Tools. You can visit the open-source Dart Web UI project and even see TodoMVC built with Dart + Web Components.